Book an inspection
Use the New Inspection wizard when a customer calls, emails or texts to book. It walks you through five steps — Location, People, Services, Schedule and Review & Book — and your progress is saved as a draft as you go, so you can stop and come back.
Before you start: have the property address, the customer’s name and a phone number or email, and know which service they want. At least one service must exist — every new account starts with Standard Home Inspection.
Start a new inspection
Section titled “Start a new inspection”From any page, open Quick Actions in the top bar and choose New Inspection.
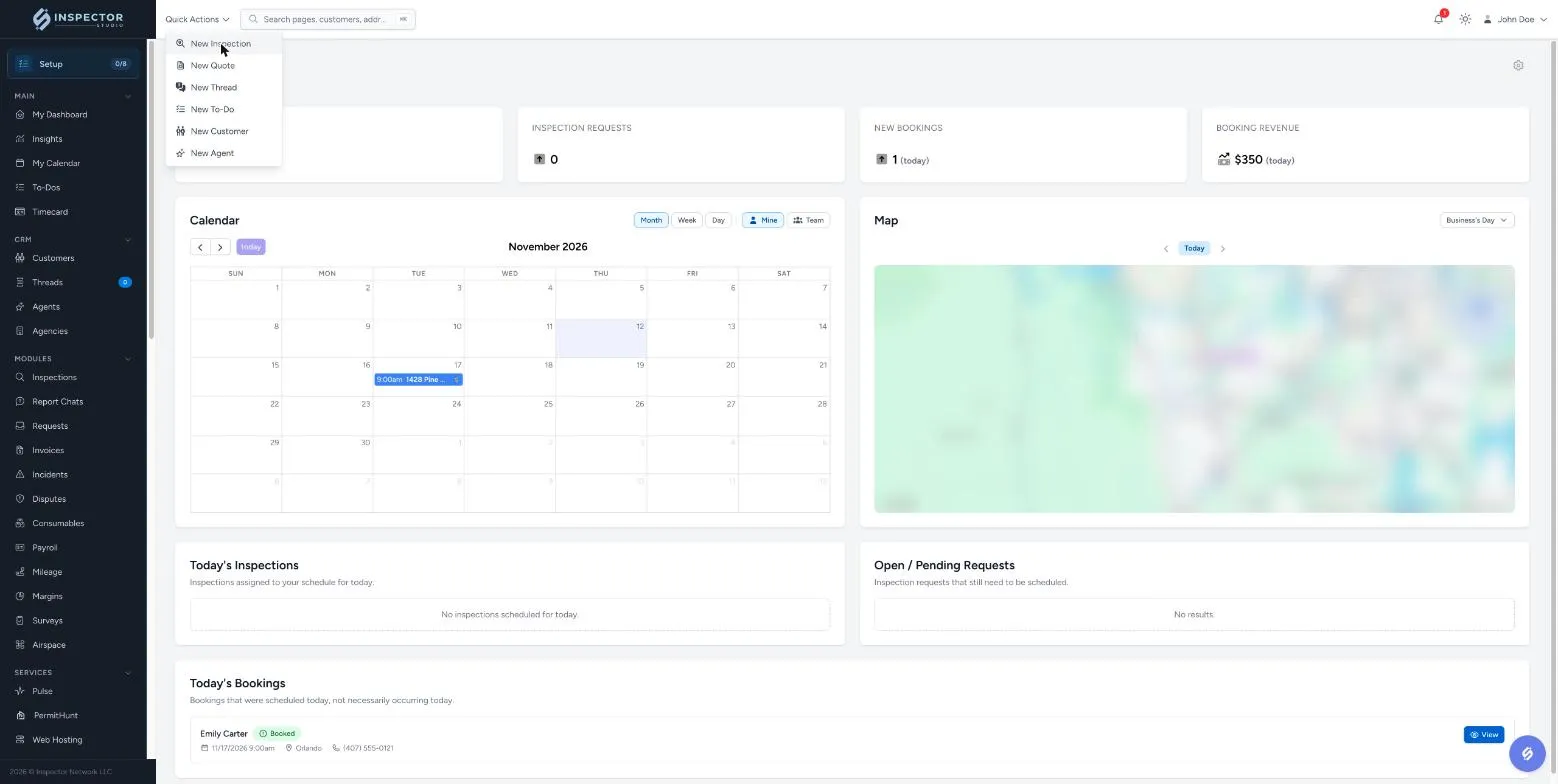
You can also open Inspections in the sidebar and click New Inspection in the top-right corner.
1. Location
Section titled “1. Location”-
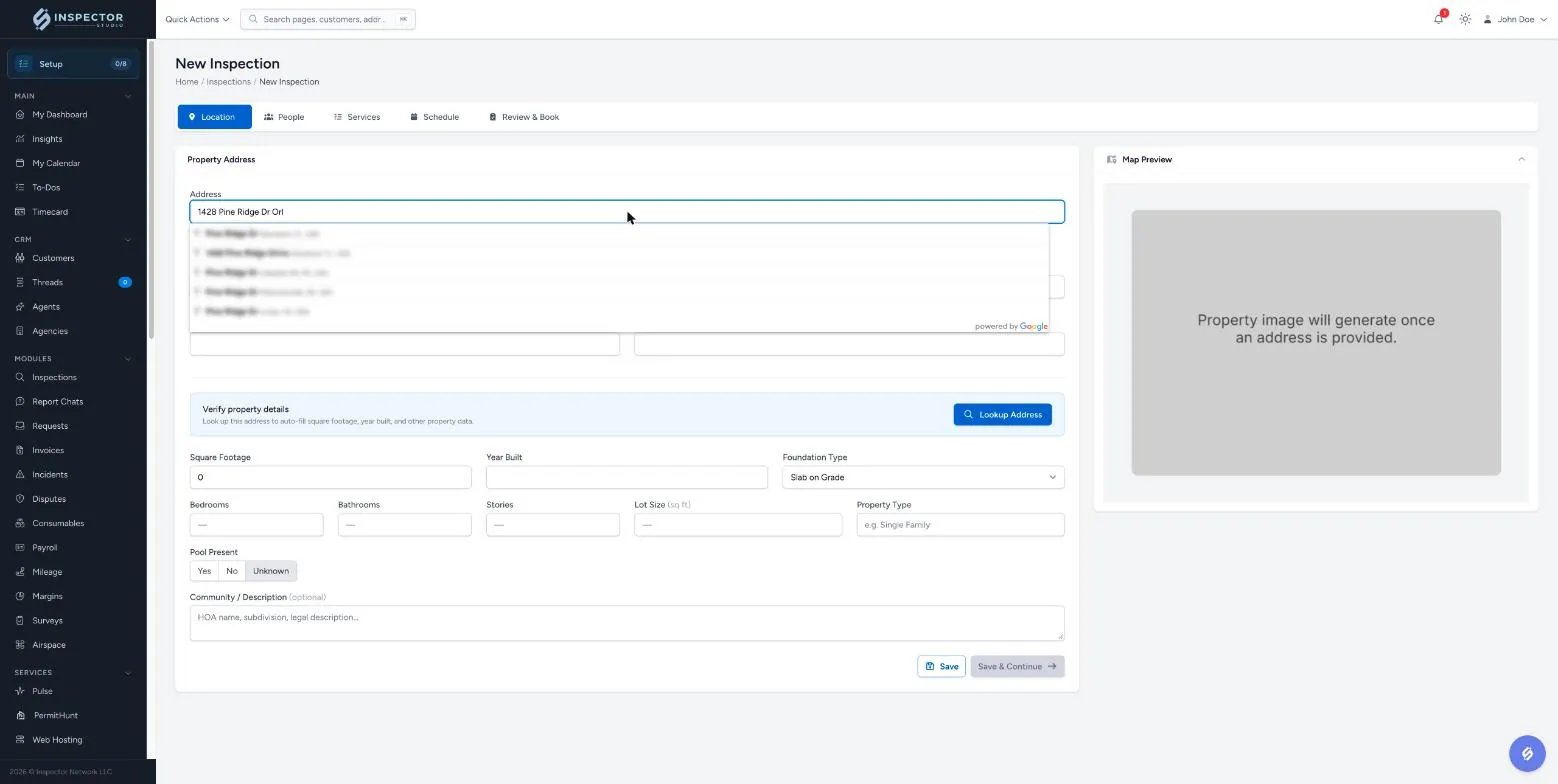
In Address, start typing the property address and pick the matching suggestion. City, state, postal code and county fill in for you.
-
Click Lookup Address to pull in the property’s square footage, year built and other details. Check them and correct anything that’s wrong — square footage and year built can change the price.
-
Click Save & Continue.
2. People
Section titled “2. People”-
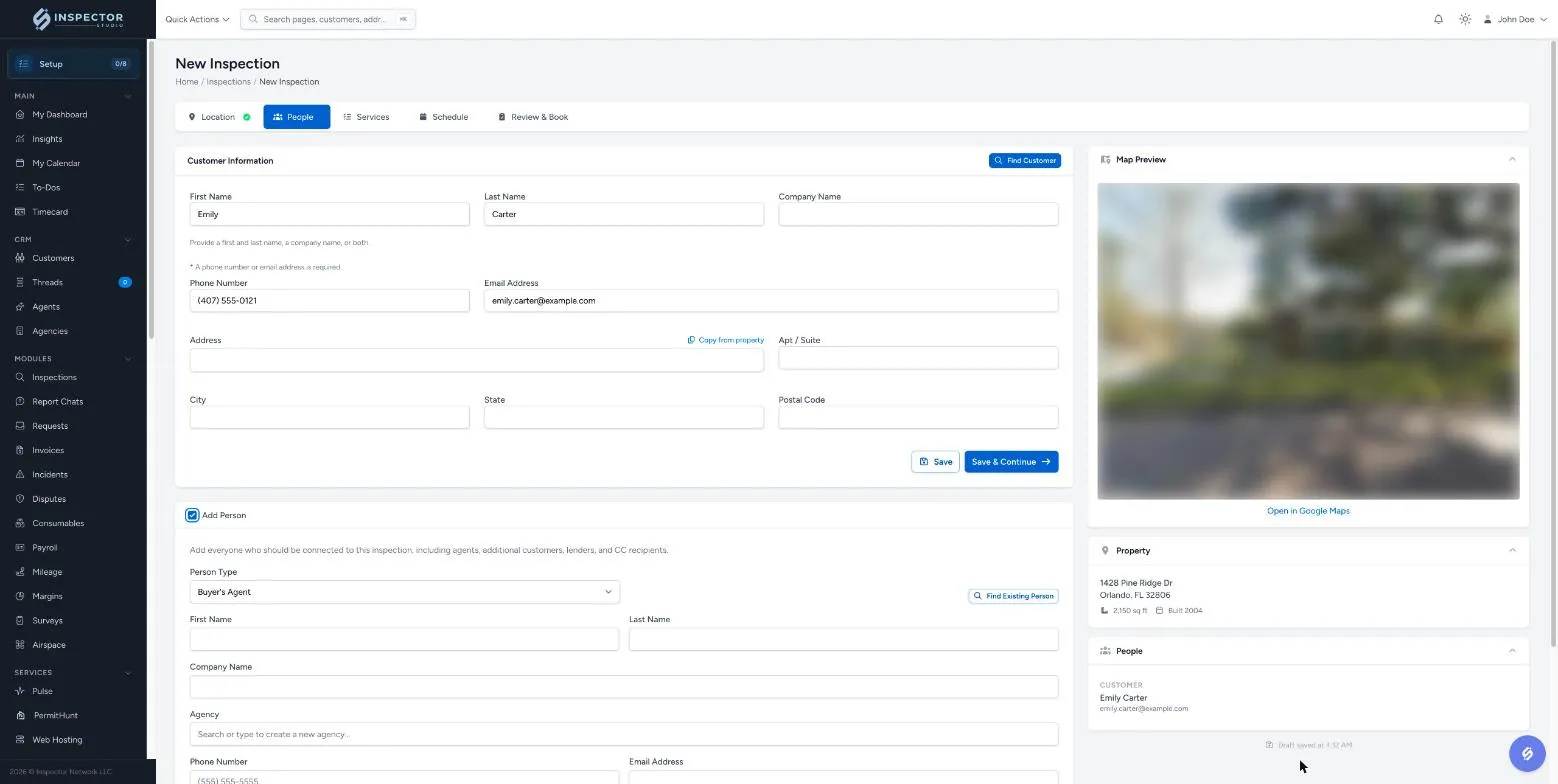
Under Customer Information, enter the customer’s first and last name (or a company name), plus a phone number or email address — at least one is required.
Already in your system? Click Find Customer instead of typing them in again.
-
To connect an agent, an additional buyer, a lender or anyone else who should be copied, tick Add Person:
- Choose the Person Type (for example Buyer’s Agent).
- Click Find Existing Person, or type their name and contact details.
- In Agency, search for the agency — or type a new name and choose Create new agency.
- Click Add Person. Repeat for anyone else.
-
Click Save & Continue.
3. Services
Section titled “3. Services”-
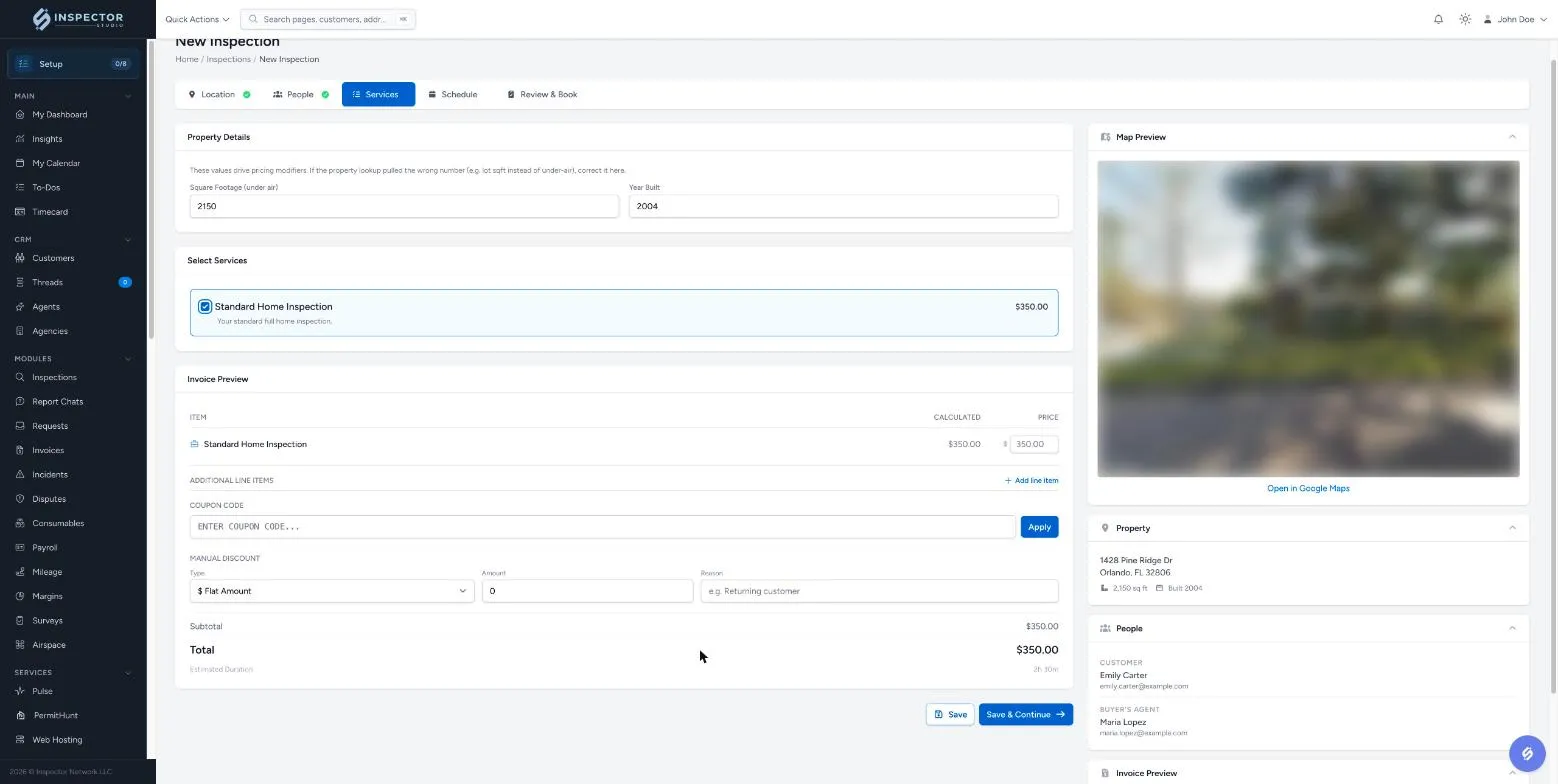
Tick each service the customer wants.
-
Review the Invoice Preview that appears. From here you can:
- change a service’s price for this inspection only,
- Add line item for anything extra,
- apply a coupon code, or
- give a manual discount (with a reason, so your team knows why).
-
Click Save & Continue.
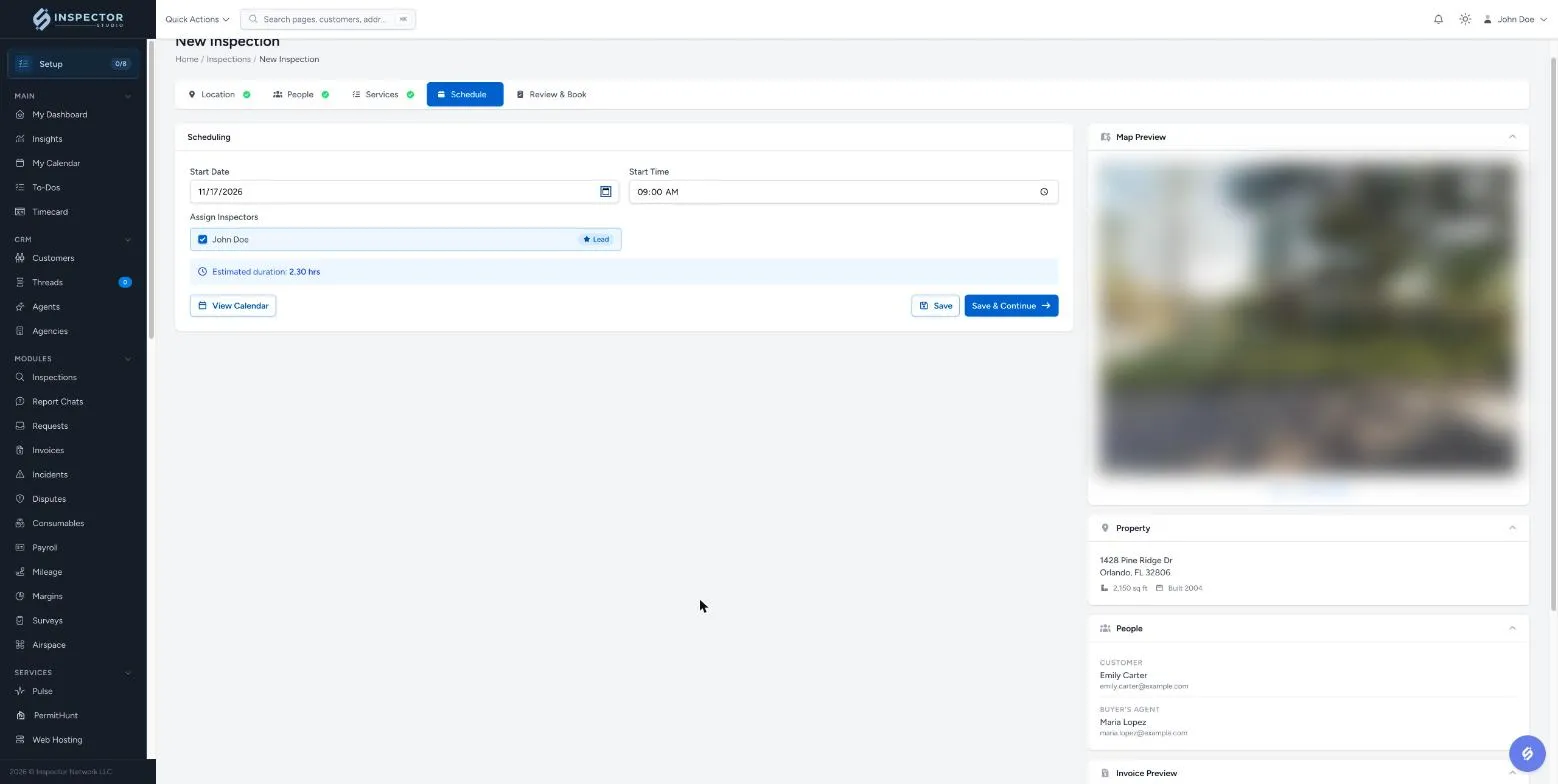
4. Schedule
Section titled “4. Schedule”-
Pick the Start Date and Start Time.
-
Under Assign Inspectors, tick who’s doing the inspection. The star marks the Lead.
The estimated duration comes from the services you picked. Click View Calendar to check the day before you commit.
-
Click Save & Continue.
5. Review & Book
Section titled “5. Review & Book”-
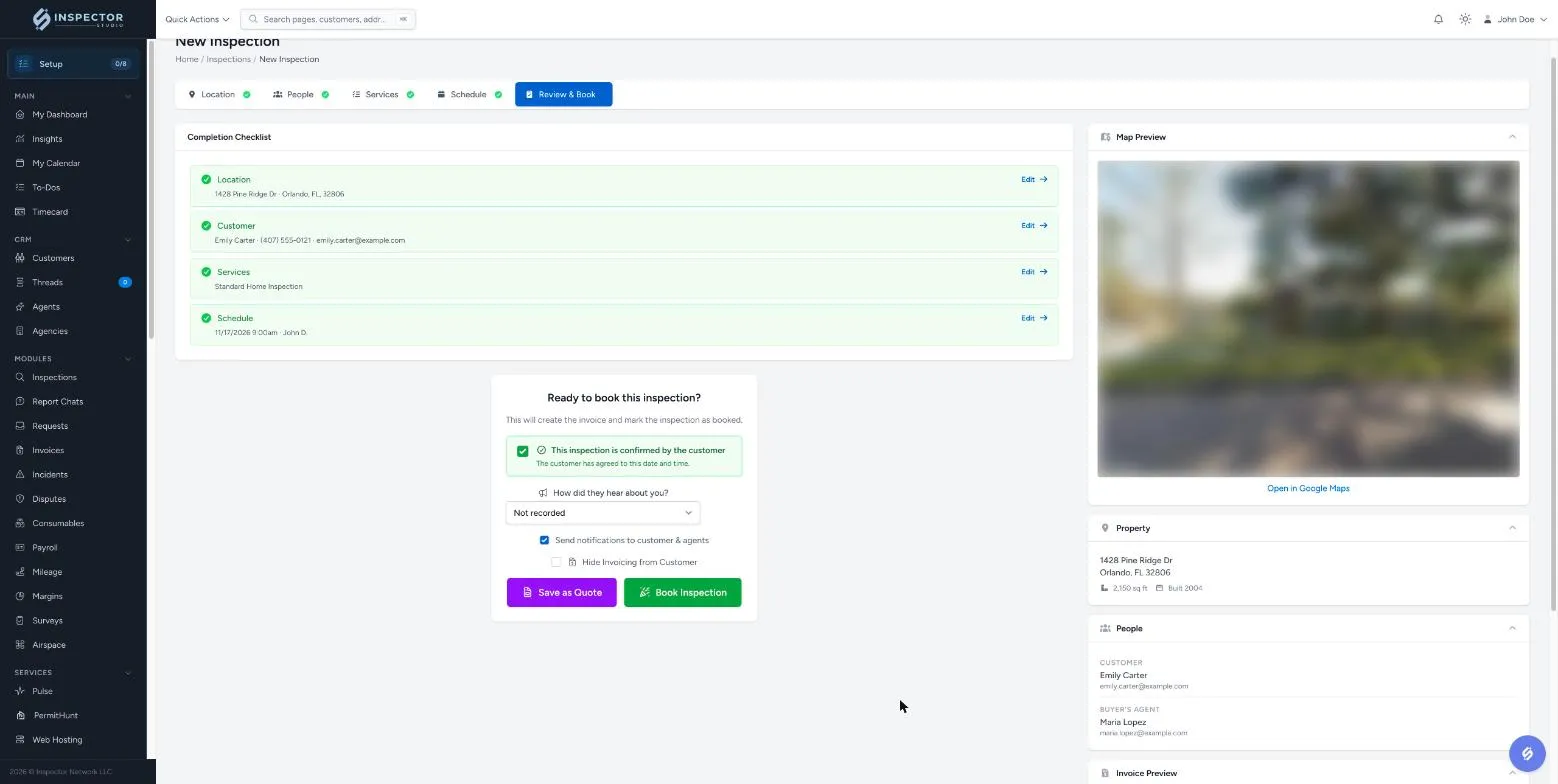
Check the Completion Checklist. Every step should have a green tick — click Edit on any row to go back and change it.
-
Set the booking options:
- This inspection is confirmed by the customer — leave ticked if they’ve agreed to the date and time.
- How did they hear about you? — record the referral source for your reporting.
- Send notifications to customer & agents — sends your automated booking notifications. Untick it if you don’t want anything sent yet.
- Hide Invoicing from Customer — tick to keep the invoice out of the customer’s view.
-
Click Book Inspection.
What happens next
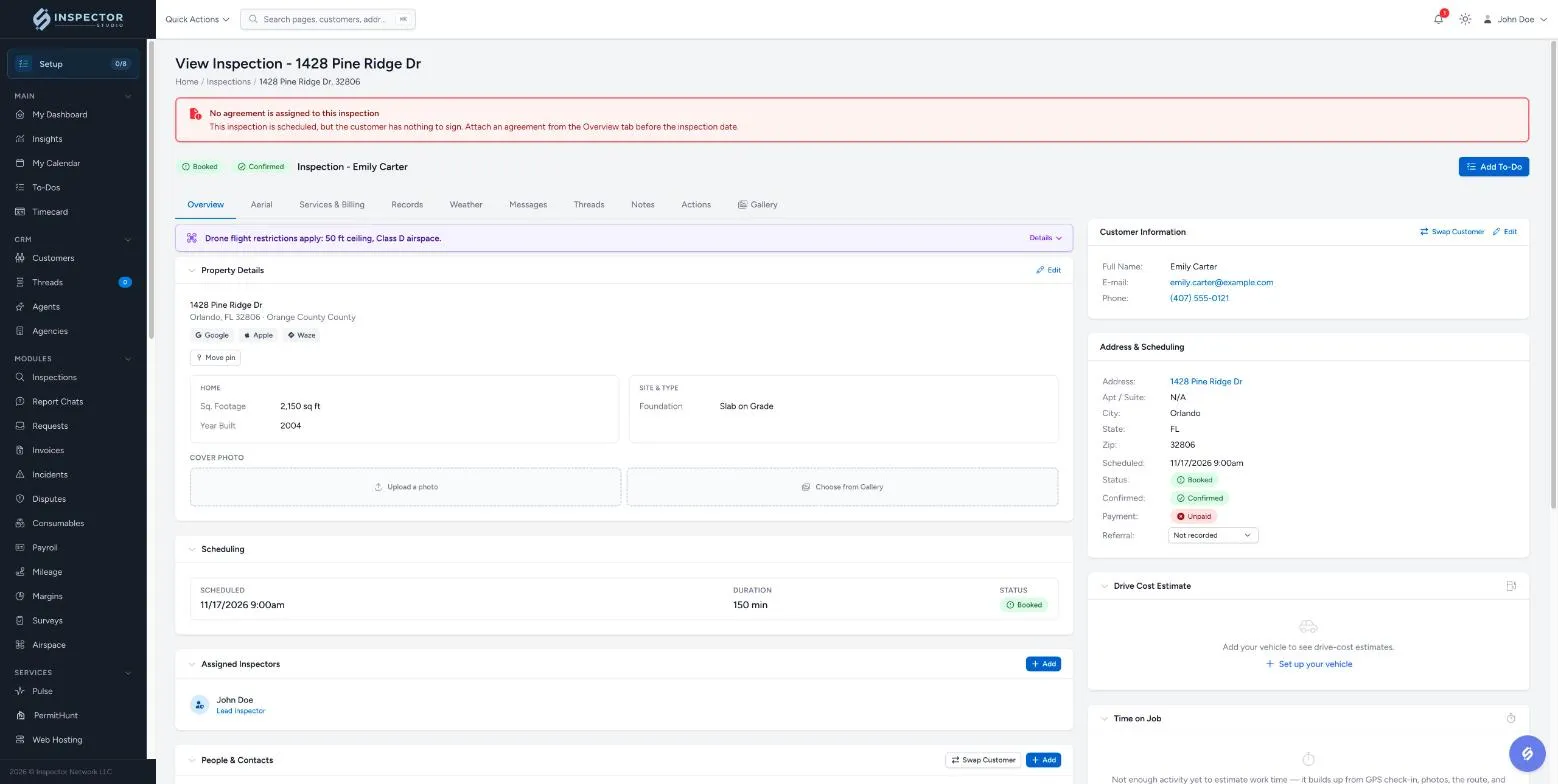
Section titled “What happens next”Inspector Studio creates the invoice, marks the inspection Booked and opens the inspection page. From here you can manage everything about the job.
-
Attach an agreement. If you see No agreement is assigned to this inspection, attach one from the Overview tab so the customer has something to sign before the inspection date.
To stop this happening on future bookings, add the agreement to the service itself: go to Settings → Services, open the service, and select it under Agreements. Every inspection that includes that service then asks the customer to sign it automatically. See Create and manage agreements.
-
Find it later on the Inspections page, or on your calendar.
-
Stopped part-way? Unfinished inspections are kept as drafts — open Inspections and click the Drafts tab to pick up where you left off.