Create and manage agreements
An agreement is the document your customer reviews and signs before their inspection. You write it once, and Inspector Studio fills in each customer’s details — their name, the property, the date and the fee — for every booking.
There are three parts to setting one up:
- Write the agreement.
- Add it to your services so every booking includes it.
- Add it to a single inspection when you need to.
Write an agreement
Section titled “Write an agreement”-
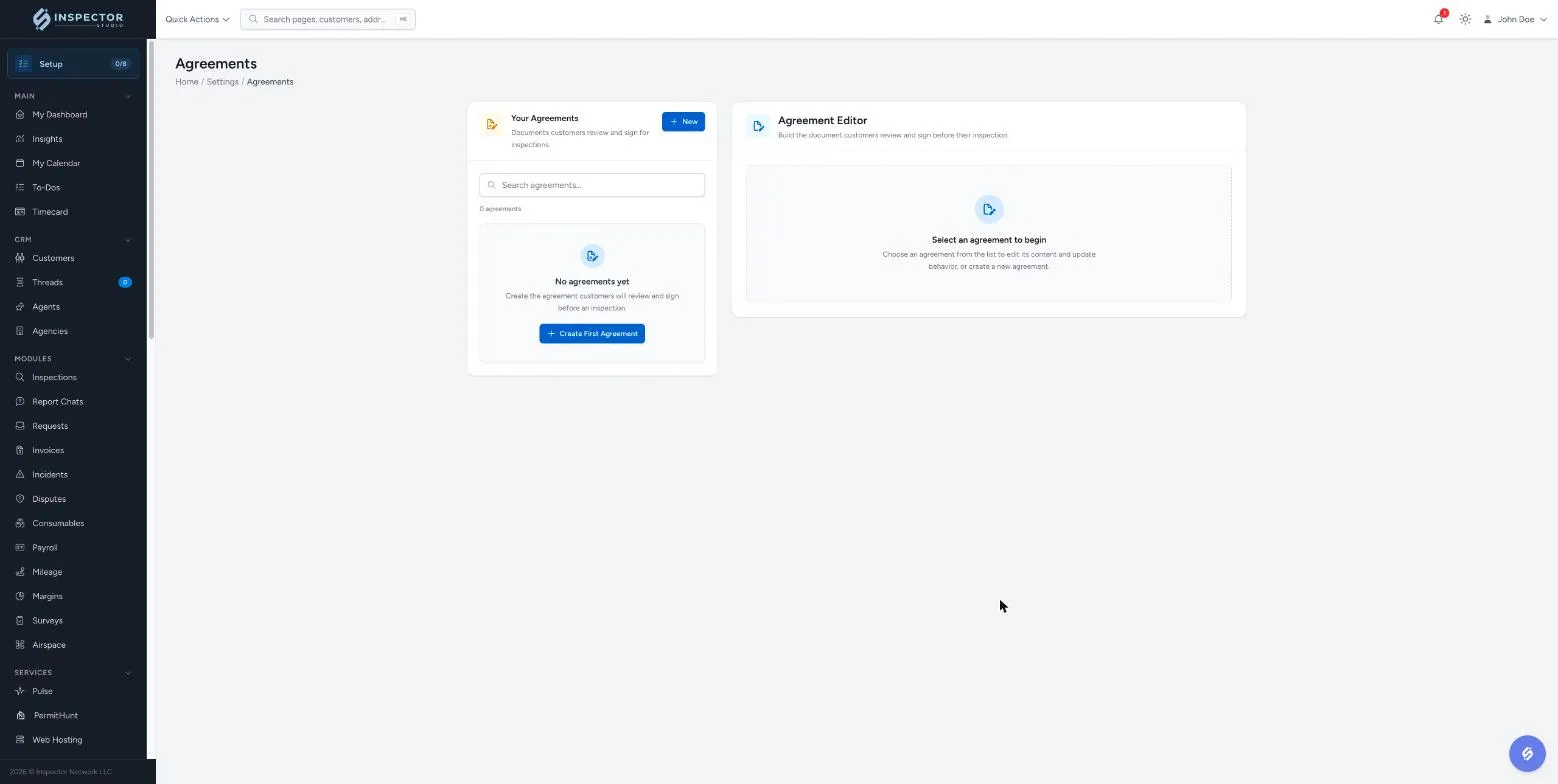
In the sidebar, open Settings → Agreements.
-
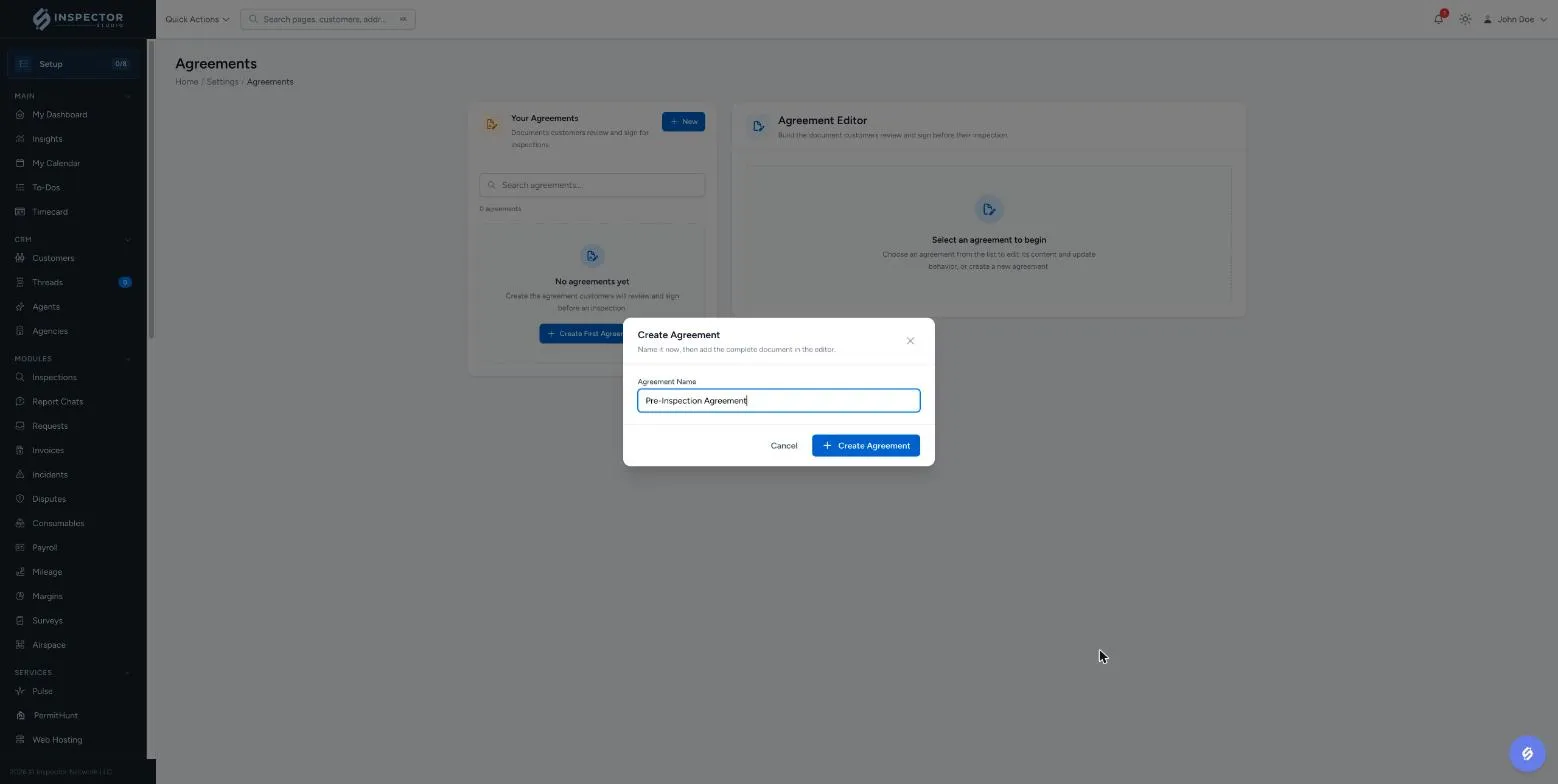
Click New (or Create First Agreement if you don’t have any yet), give the agreement a name your team will recognise — for example Pre-Inspection Agreement — and click Create Agreement.
-
Write your agreement in Agreement Content. Use the toolbar for headings, bold text, lists and links, or paste in an agreement you already use.
-
Wherever the customer’s own details should appear, insert a variable. Click in the text where it belongs, open Insert Customer & Inspection Variables, pick a tab, and click the variable. It’s added as a placeholder like
{{client_name}}.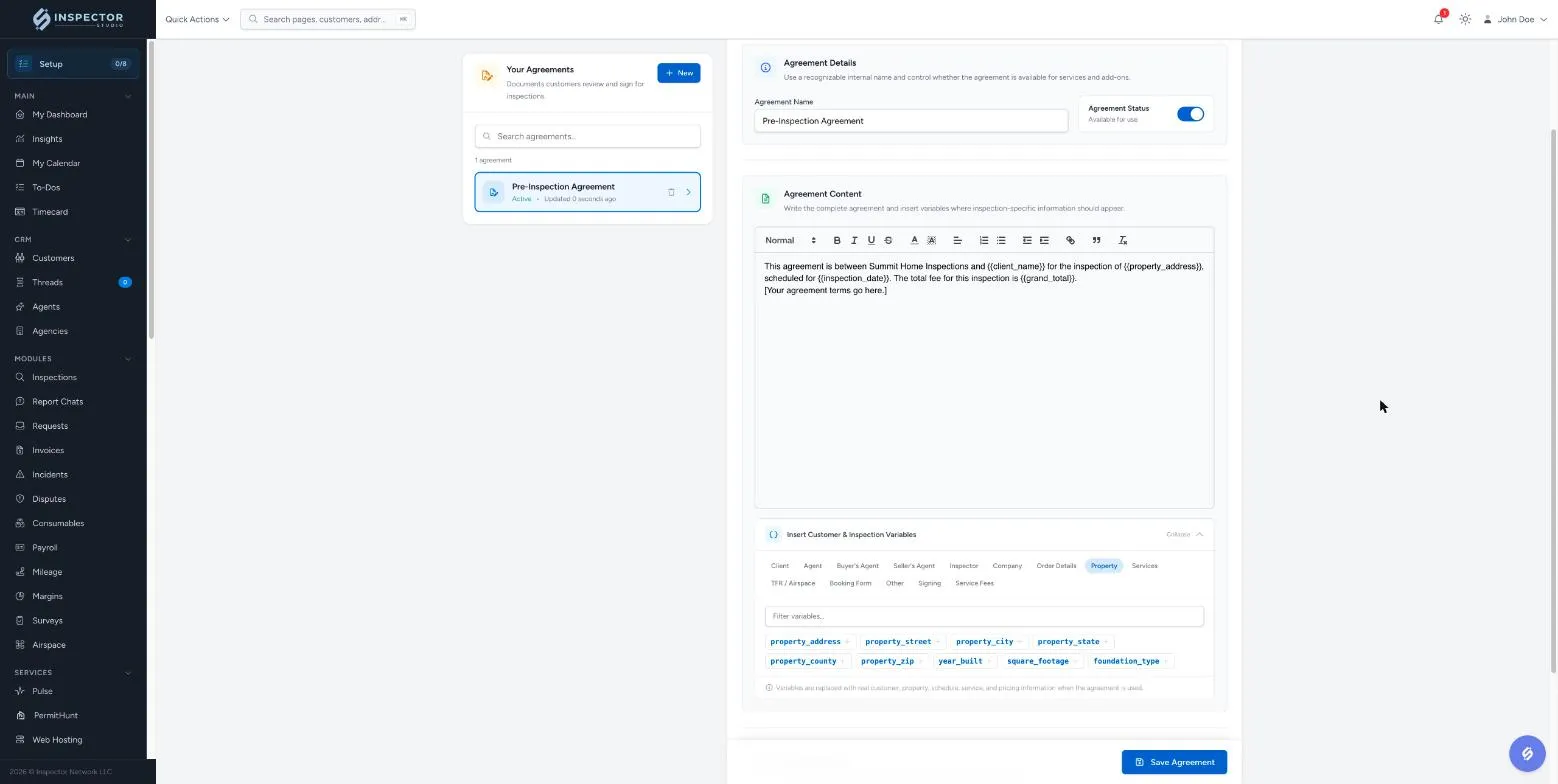
-
Click Save Agreement.
Variables you’ll use most
Section titled “Variables you’ll use most”| Tab | Variable | Fills in |
|---|---|---|
| Client | client_name |
The customer’s name |
| Property | property_address |
The property address |
| Order Details | inspection_date |
The inspection date |
| Order Details | grand_total |
The total fee |
Each tab — Client, Agent, Buyer’s Agent, Seller’s Agent, Inspector, Company, Order Details, Property, Services and more — has its own set. Type in Filter variables to search them. The Service Fees tab has a variable for each of your services’ prices.
See every variable and what it fills in: Variables.
Agreement status and update behavior
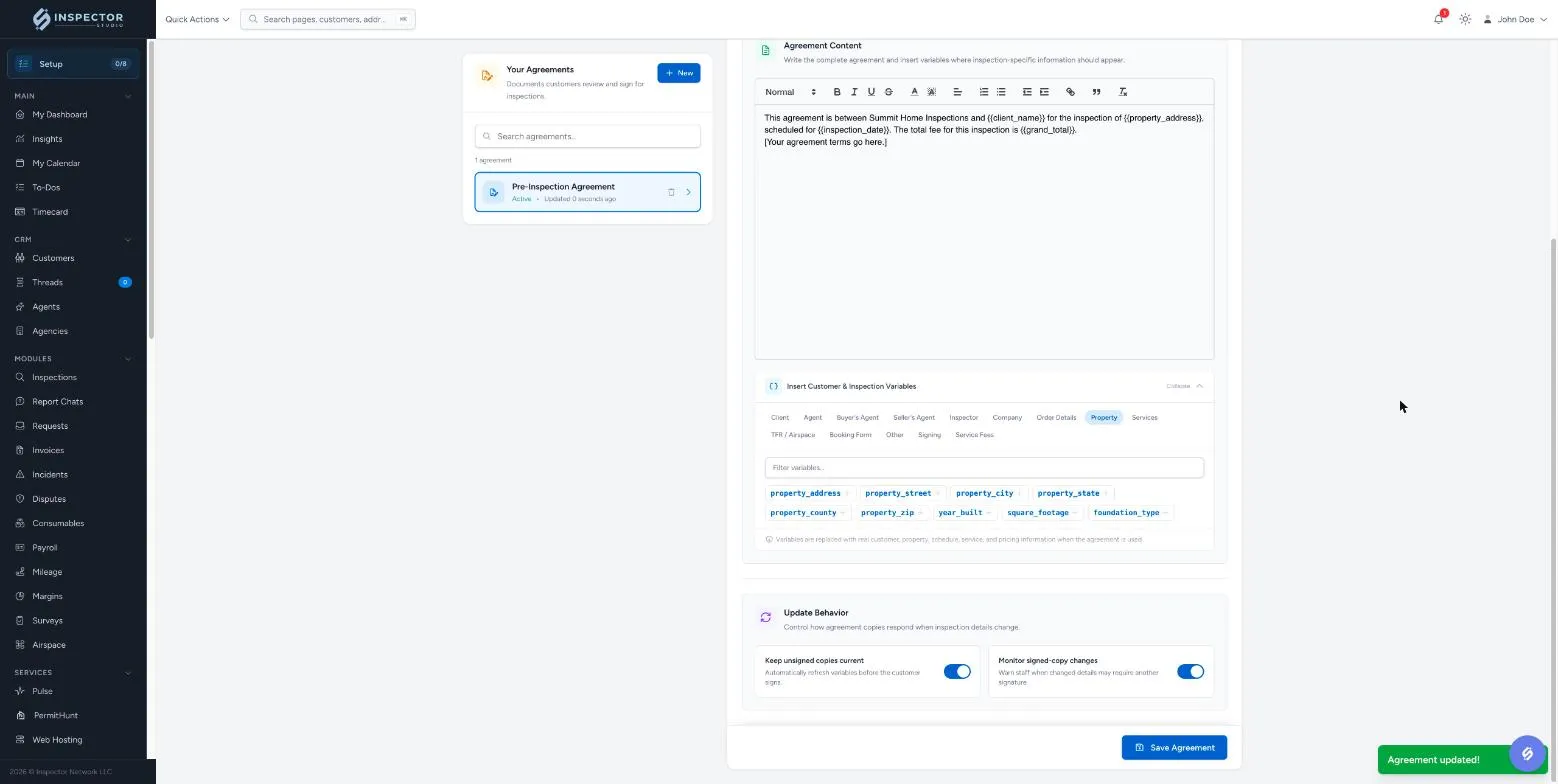
Section titled “Agreement status and update behavior”- Agreement Status — only active agreements are attached to bookings or offered when you add one to an inspection. Turn it off to retire an agreement without deleting it; services that still list it simply skip it.
- Keep unsigned copies current — if the inspection’s details change before the customer signs (a new date, a different fee), their copy updates to match.
- Monitor signed-copy changes — if details change after the customer has signed, your team is warned that the agreement may need signing again.
Both update options are on by default.
Include it with a service automatically
Section titled “Include it with a service automatically”Add the agreement to a service and every new booking with that service asks the customer to sign it — whether your office books it or the customer books online. No one has to remember to attach it.
-
In the sidebar, open Settings → Services and click Edit on the service.
-
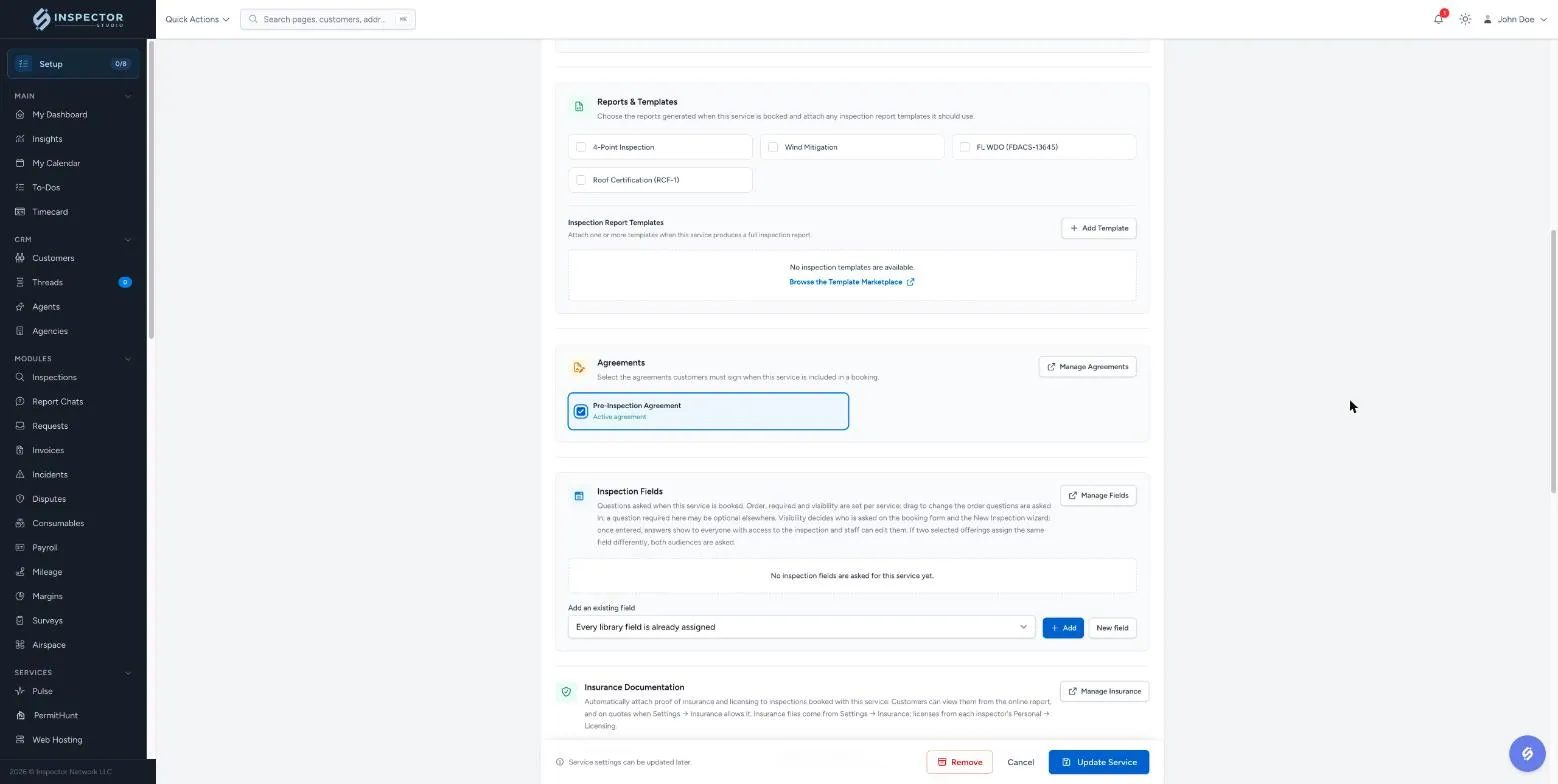
Scroll to Agreements and select each agreement customers must sign for this service.
-
Click Update Service.
Repeat for each service that needs it. If an inspection includes several services, the customer is asked to sign every agreement those services require. Add-ons can carry agreements too — set them up the same way from Settings → Add-ons.
Add an agreement to one inspection
Section titled “Add an agreement to one inspection”Use this for an inspection that was booked before the service had an agreement, or for a one-off agreement that only this job needs.
-
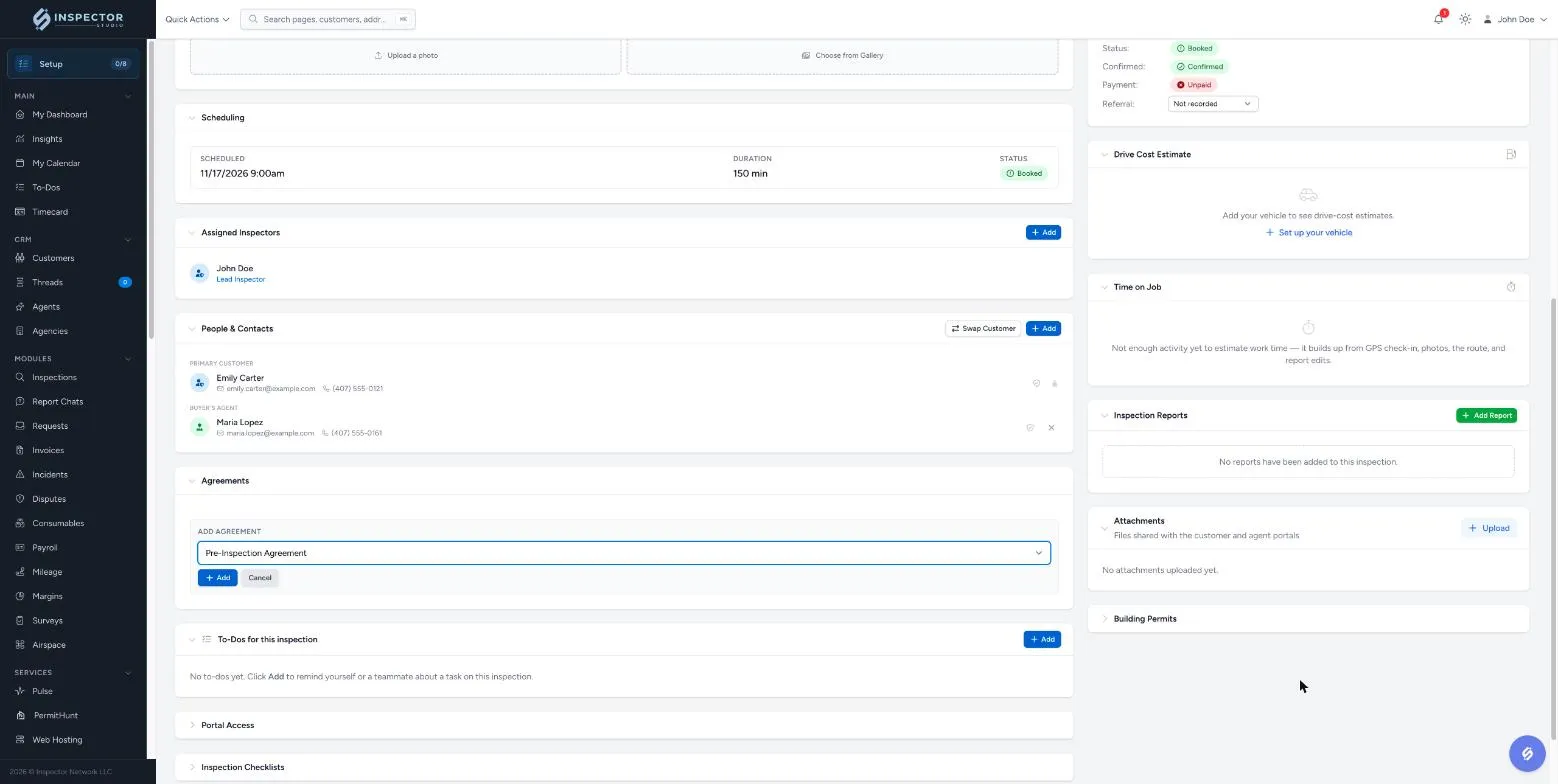
Open the inspection and scroll to Agreements on the Overview tab.
-
Click Add, choose the agreement under Select agreement, and click Add.
The agreement shows Awaiting signature until the customer signs. Click the eye icon to View it — the variables are filled in with this inspection’s details.
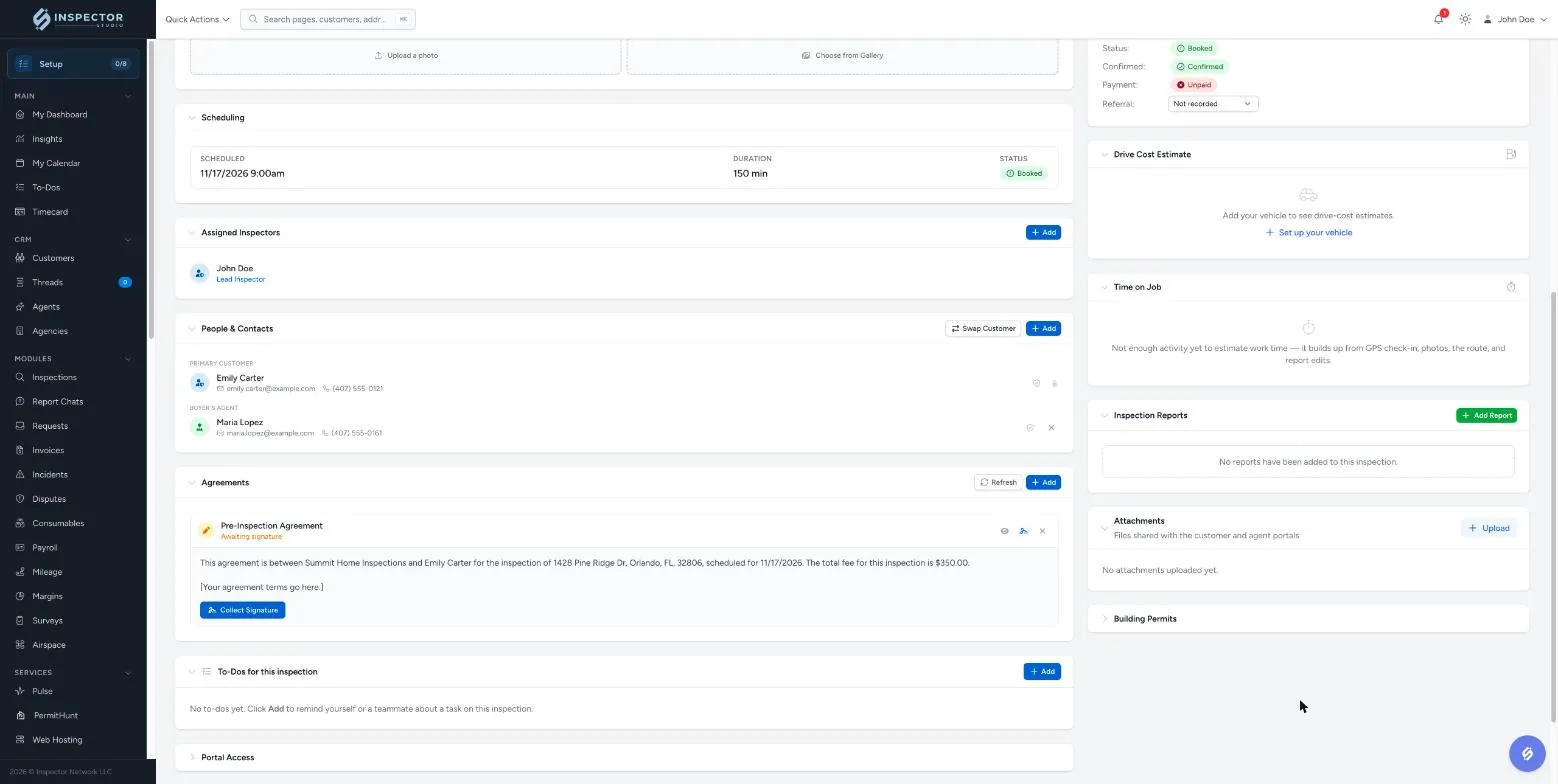
From the same card you can:
- Collect Signature — have the customer sign in person, on your device.
- Refresh — regenerate unsigned agreements with the inspection’s current details.
- ✕ — remove the agreement from this inspection.